In the world of computing, maintaining the health and integrity of your system’s storage is crucial. One powerful tool in the Windows operating system arsenal is CHKDSK (Check Disk), designed to identify and repair disk-related issues. With the release of Windows 11, the CHKDSK utility has undergone enhancements to deliver even more effective and efficient disk management. In this blog post, we will explore the significance of CHKDSK, when and how to run it, interpret results, and best practices for Windows 11 users.
Understanding CHKDSK
CHKDSK is a built-in Windows utility that helps diagnose and fix various issues related to your hard drives, including bad sectors, cross-linked files, and corrupted file system structures. It scans your storage media for errors and attempts to repair them, thus ensuring data integrity and optimizing system performance. By running CHKDSK, you can proactively identify and rectify disk-related problems, preventing potential data loss and system crashes.
When Should You Run a CHKDSK?
Several scenarios may indicate the need to run CHKDSK on your Windows 11 system:
System Crashes or Freezes
If your system frequently crashes or freezes or experiences unexplained slowdowns, underlying disk issues might be the cause. Running CHKDSK can help identify and resolve such problems.
File System Corruption
Unexpected power outages, improper system shutdowns, or malware infections can corrupt the file system, leading to data inconsistencies. CHKDSK can detect and repair these issues, ensuring the file system remains healthy.
Bad Sectors
Over time, hard drives may develop bad sectors, areas on the disk that cannot reliably store data. CHKDSK scans for and attempts to recover data from these sectors, marking them as unusable to prevent further data loss.
Running CHKDSK in Windows 11
Running CHKDSK in Windows 11 is a straightforward process. Follow these steps:
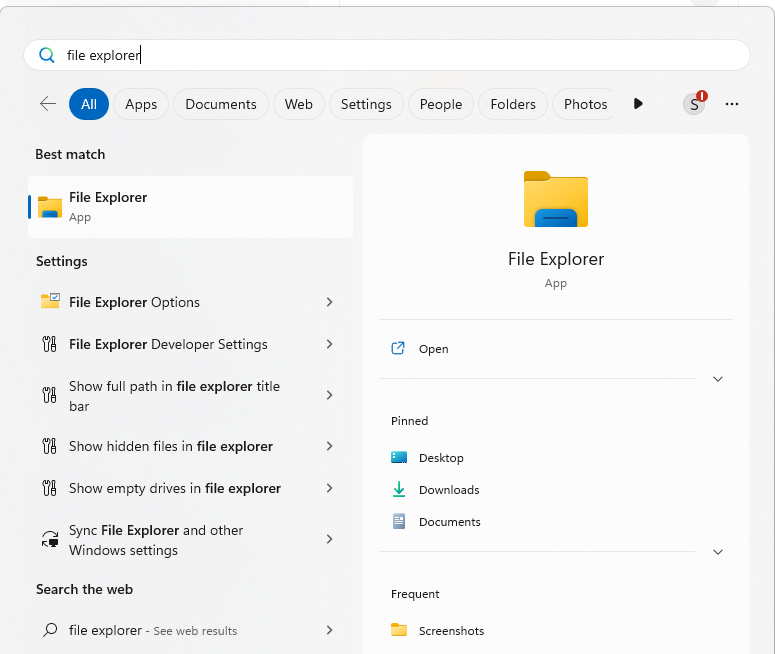
Click the Start button or press the Windows key on your keyboard.
In the search bar, type “File Explorer” and click on the matching result.
In the File Explorer window, locate the drive you want to check, right-click on it, and select “Properties.”
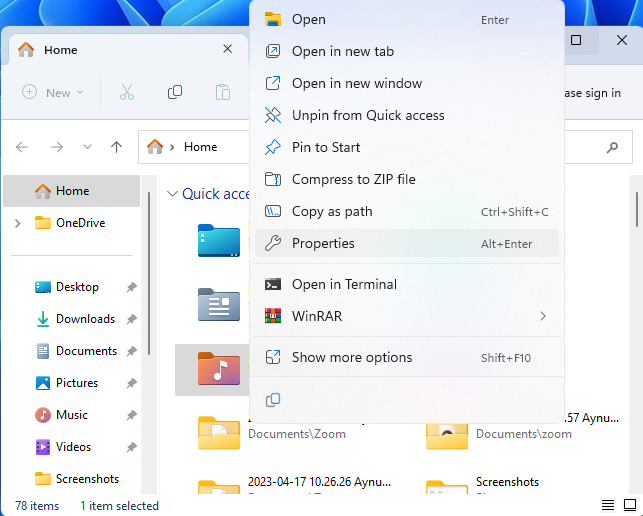
In the Properties window, navigate to the Tools tab and click on the “Check” button in the “Error-checking” section.
If prompted, select “Scan drive” to perform a standard scan. For a more thorough scan that includes fixing errors, select “Scan and repair the drive.”
Windows may require you to restart the computer for the scan to begin. If so, save any unsaved work and restart the system.
During startup, CHKDSK will run automatically and display its progress on the screen. This process might take some time, depending on the size and condition of the drive.
Interpreting CHKDSK Results
After completing the CHKDSK scan, Windows will display the results. Here are a few key indicators to look for:
No errors were found
This message indicates that no issues were detected during the scan and your drive is in good health.
Windows has made corrections to the file system
CHKDSK found and fixed errors on the drive. The file system should be more stable now.
Windows has found errors on the disk
This message suggests that errors were detected, but CHKDSK couldn’t fix them. In such cases, it’s advisable to consult a professional or consider replacing the drive.
Best Practices and Tips
To make the most of CHKDSK in Windows 11, consider the following best practices and tips:
- Always run CHKDSK with administrative privileges. To do this, right-click on the Start button, select “Command Prompt (Admin),” and type “chkdsk” followed by the drive letter (e.g., “chkdsk C:”).
- If you suspect a driver issue but don’t want to make any changes, you can use the “/F” parameter to run CHKDSK in read-only mode. For example, “chkdsk C: /F” will check the C drive without fixing any errors.
- Schedule regular CHKDSK scans for each of your drives. This can be done using the “/F” parameter or through the drive’s Properties window.
- When encountering severe disk-related issues or suspecting hardware problems, it is advisable to back up your important data before running CHKDSK or seeking professional assistance.
- Stay patient during the CHKDSK process, especially if you’re scanning large drives. Interrupting or restarting the system midway through the scan may lead to data loss or further disk corruption.
CHKDSK remains an essential tool in Windows 11 for maintaining the health and integrity of your storage media. By running regular scans and addressing disk-related issues promptly, you can enhance the performance and reliability of your system. Remember to interpret the CHKDSK results carefully and follow best practices to ensure a smooth experience. With CHKDSK at your disposal, you can keep your Windows 11 system running smoothly and protect your valuable data from potential disk failures.
Frequently Asked Questions
What is CHKDSK, and what does it do?
CHKDSK (Check Disk) is a built-in utility in Windows 11 that scans and repairs issues related to the file system and disk on your computer. It helps detect and fix problems like bad sectors, file system corruption, and cross-linked files, ensuring the integrity of your data and optimizing system performance.
How often should I run CHKDSK in Windows 11?
The frequency of running CHKDSK depends on your usage and the condition of your drives. It’s a good practice to run CHKDSK on a regular basis, such as once every few months, to proactively identify and address disk-related issues. Additionally, it’s recommended to run CHKDSK after experiencing system crashes, freezes, or other signs of disk problems.
Can I use CHKDSK while the computer is in use?
CHKDSK can be run while the computer is in use, but it is more effective when the drive isn’t actively in use. To perform a comprehensive scan and repair, it’s recommended to schedule CHKDSK during a system restart. This allows CHKDSK to access the drive exclusively and make necessary repairs without interference from running applications or the operating system.
What should I do if CHKDSK finds errors on my drive?
If CHKDSK finds errors on your drive, it will attempt to fix them automatically during the scan. After the scan is complete, it’s essential to check the results. If CHKDSK was able to fix the errors, you should notice improved stability and performance. However, if CHKDSK couldn’t fix the errors, it might indicate a more significant issue with your drive. In such cases, it’s advisable to consult a professional or consider replacing the drive.
Can I stop CHKDSK once it has started?
It is generally not recommended to stop CHKDSK once it has started, especially during the repair phase. Interrupting CHKDSK abruptly may lead to data loss or further disk corruption. If you find it necessary to stop CHKDSK, try to do so before the repair process begins or during the early stages of the scan. However, it’s best to let CHKDSK complete its operation to ensure the integrity of your data and the stability of your system.
More of Our Blogs Related to CHKDSK
CHKDSK Commands on Windows 10
Learn about the importance of CHKDSK, how to run it on Windows 10, and when to turn to data recovery services like PITS for help.
CHKDSK Repair Commands on Windows 10
Learn how to use CHKDSK commands on Win10, and explore recovery services offered by PITS for cases when CHKDSK is unsuccessful.